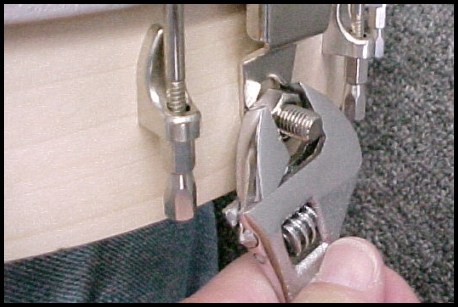
Before doing anything else, remove the strings and bridge. If you're really careful, you can reuse the strings, but it's a real pain, so I suggest having another set on hand for when you put everything back together. OK--After you've taken off the strings, remove the exterior nut holding the tailpiece over the threaded end of the coordinator rod protruding through the rim.
|
 |
| |
Click on photo to enlarge it
|
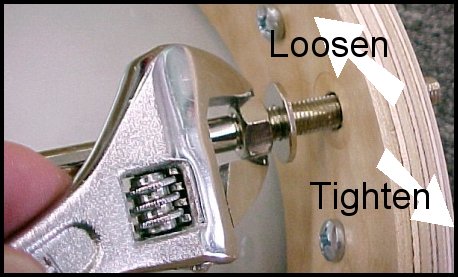
Loosen the interior nut on the coordinator rod, running it as far up the coordinator rod as it will go.
|
 |
| |
Click on photo to enlarge it
|
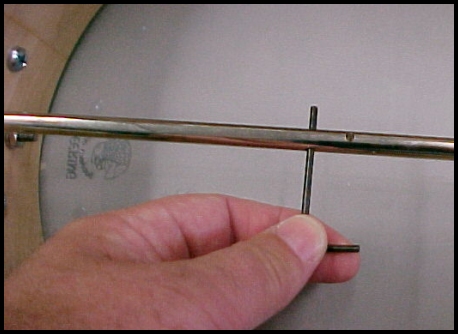
Loosen the coordinator rod. If it is really tight, you can use a drill bit or a small Allen wrench stuck through the holes to break it loose. Speaking of breaking, do be careful, as bits and Allen wrenches can snap if you apply too much pressure.
|
 |
| |
Click on photo to enlarge it
|
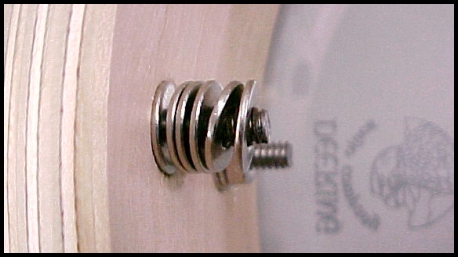
Unscrew the coordinator rod completely
|
 |
| |
Click on photo to enlarge it
|
Remove the coordinator rod by sliding it obliquely, back towards the neck.
|
 |
| |
Click on photo to enlarge it
|
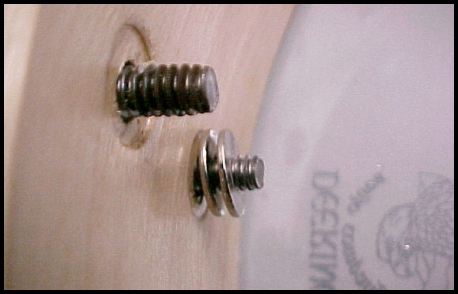
Note that the heel of the neck has two lagscrews protruding into the pot. The one that will be closer to the head of the banjo is the "upper" screw. This can be confusing, as we normally work on these things "upside down," but by convention the terms "upper" and "lower" refer to the instrument when viewed from the front. Remove any and all washers on the lower lagscrew... This number varies from banjo to banjo, so make note of how many you remove.
|
 |
| |
Click on photo to enlarge it
|
| Remove the nut from the upper lag screw.
|  |
| |
Click on photo to enlarge it
|
Remove any and all washers from the upper lagscrew... This number varies from banjo to banjo, so make note of how many you remove.
|
 |
| |
Click on photo to enlarge it
|
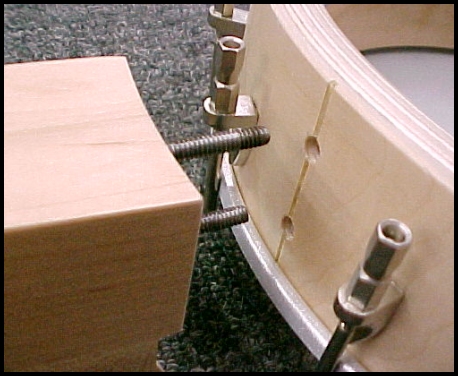
Remove the neck by pulling the lagscrews through the two holes in the rim.
|
 |
| |
Click on photo to enlarge it
|
That's it; you're done and now have bunches of banjo parts lying around. To reassemble the thing, either simply reverse these directions, or ![[ ZEPP Country Music]](../logobw.gif)